The list of available cloud storage services in MSP360 Backup already encompasses most major players on the market. Today we welcome the newcomer into the cloud storage world — Wasabi. In this article, we discuss how you can use Wasabi as your backup destination of choice in MSP360 products.
Introduction
Wasabi is the newcomer in the world of cloud storage providers. It's an S3-compatible cloud storage with rather impressive characteristics. They claim to outperform Amazon S3 in the speed department while costing 80% less. We're glad to announce that we now natively support them in our flagship backup solution so you can get swifter transfer speeds at a lower cost. You should probably refer to their website so as to examine whether they meet your backup requirements. Their main advantage is simplicity. Unlike the big three — Amazon, Google, and Microsoft — Wasabi does not have storage tiers, which clearly simplifies your interaction with their service. S3-compatibility, lack of storage tiers, lack of egress fees, and high transfer speeds should help Wasabi become the go-to cloud storage service for many companies. Now let's see how you can take advantage of Wasabi in MSP360 products.
Signing up for Wasabi
Signing up for Wasabi really takes no more than a few minutes. Head over to their website, and click TRY or BUY Now on the homepage.
Enter your name, email, and click Start your Free Trial. The confirmation email will be sent to you immediately.
Once you receive the email, click Create Account.
You will be redirected to the final sign up page where you'll need to come up with a password. Ensure that it's secure so as to avoid headache in the future.
You will then finally reach the dashboard. The first thing you need to do is to create a Access/Secret key pair. On the left sidebar, click Access Keys. Then click Create New Access Key.

The key pair will automatically be created, whereupon you can download them in the CSV format or just straight copy them to clipboard.
Now that you have the credentials, it's time to add them in MSP360 Backup.
Wasabi in MSP360 Backup
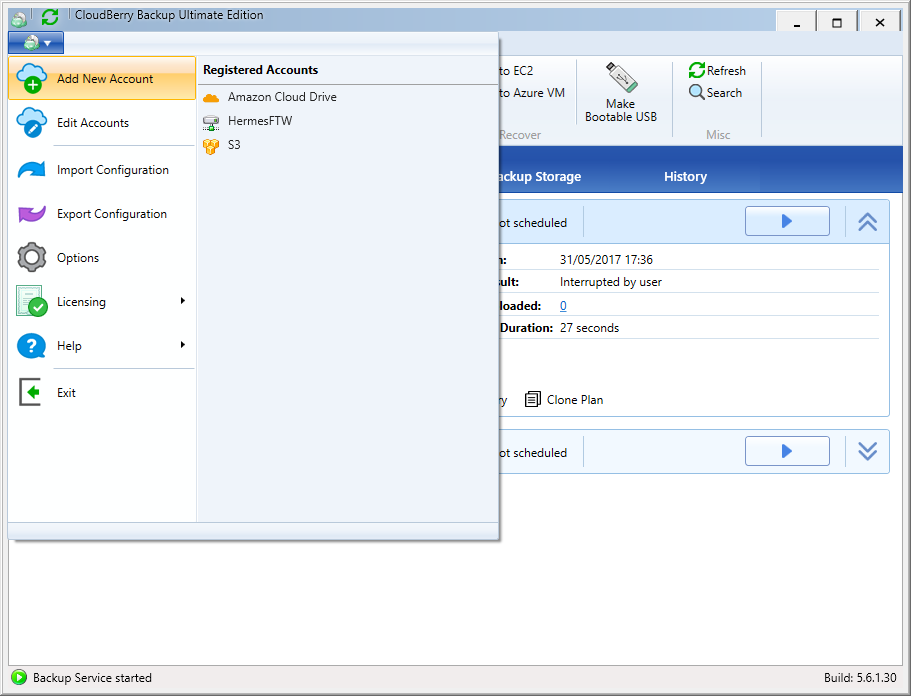
Wasabi can be added as a backup destination in MSP360 Backup starting from version 5.6.1 onward. To do so, click Add New Account on the main toolbar.

In the freshly appeared cloud storage options, select Wasabi.
Enter your credentials, specify the bucket and click OK.
Splendid. Now you can select Wasabi as your backup destination of choice when configuring backup plans.
Wasabi in MSP360 Explorer
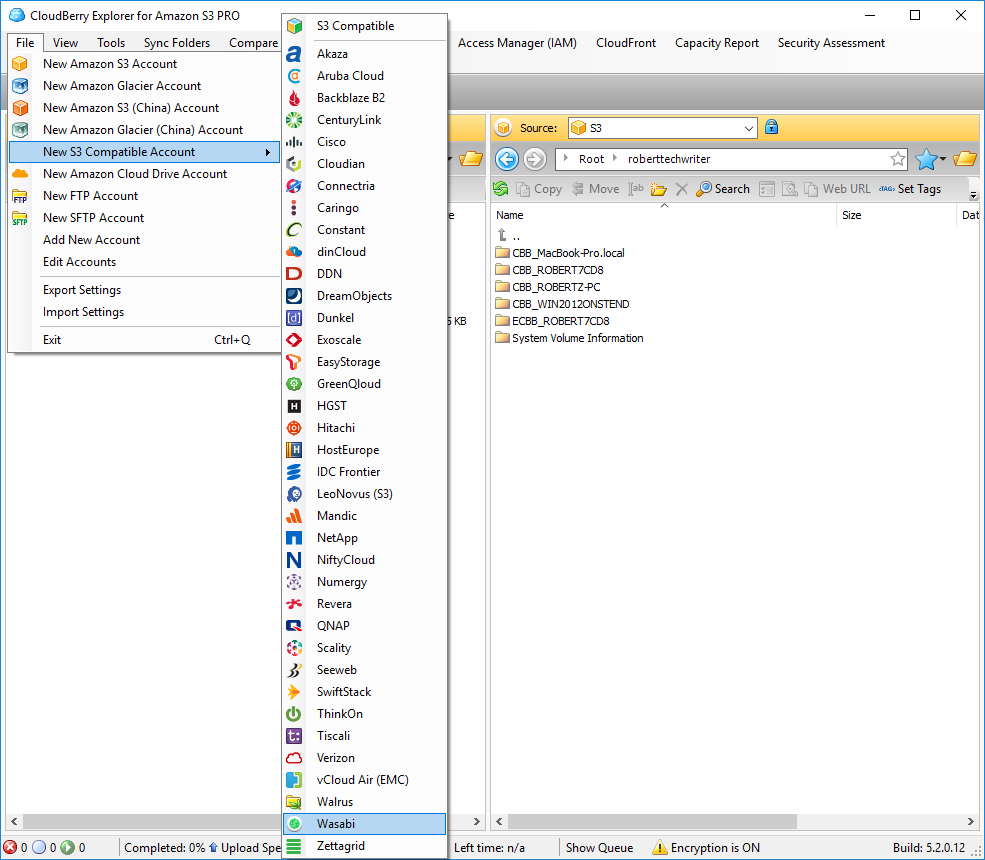
The process of adding Wasabi in Explorer is pretty simple and similar to that of MSP360 Backup. Ensure that the version of your Explorer is not lower than 5.2. Go ahead and launch Explorer. Under File, point to New S3 Compatible Account, and click Wasabi.
Wasabi also offers an application known as ‘Wasabi Explorer’ that was based on MSP360 Explorer. It is customized for use on Wasabi Hot Storage and is available for Windows as well as for macOS.

Enter your credentials, specify the bucket and click OK.
Having done that, you can go ahead and access all your files within your Wasabi storage.
Similarly, we're about to add the support for Wasabi in MSP360 Drive and MBS Web Console. Stay tuned for that!


