In this post, we provide a step-by-step instruction on how to configure Amazon VMimport Role in order to import virtual machine images from your existing environment to Amazon EC2 instances.
How to Configure VMimport Role
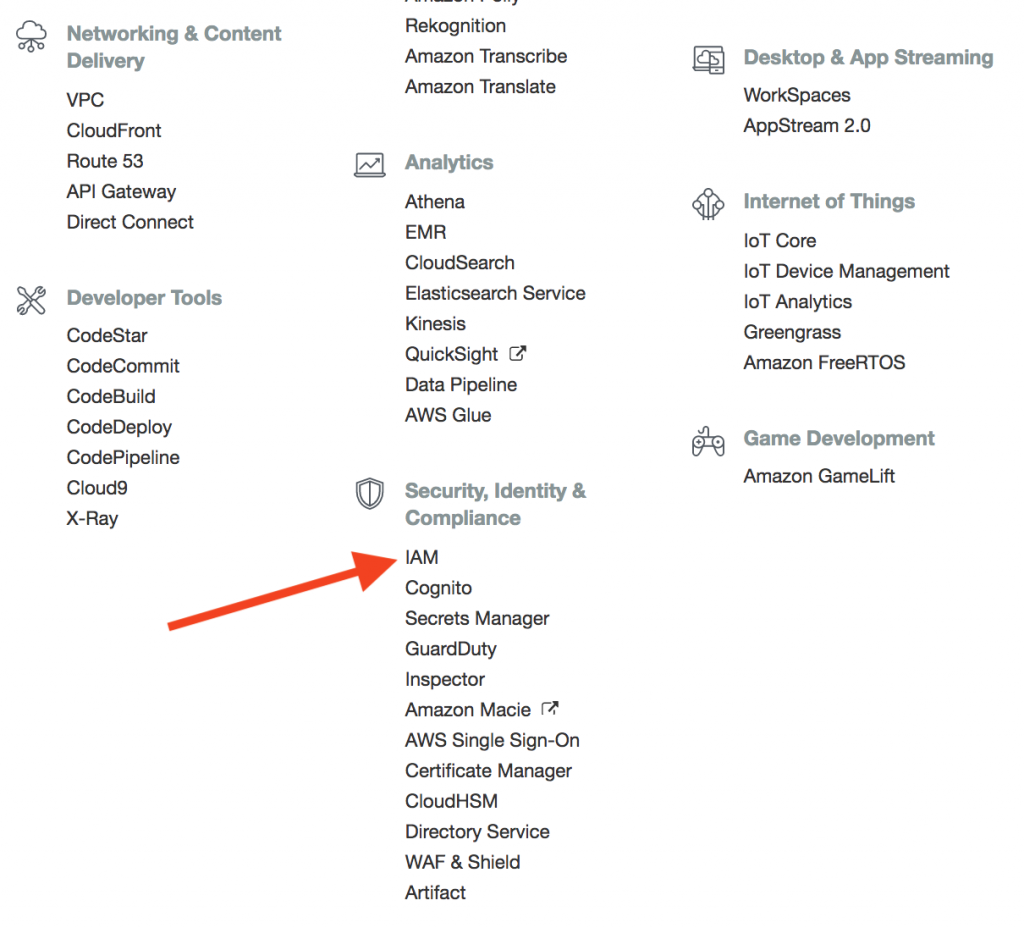
1. Go to Amazon Web Services, log in using your Amazon credentials and click on IAM, under Security, Identity & Compliance.


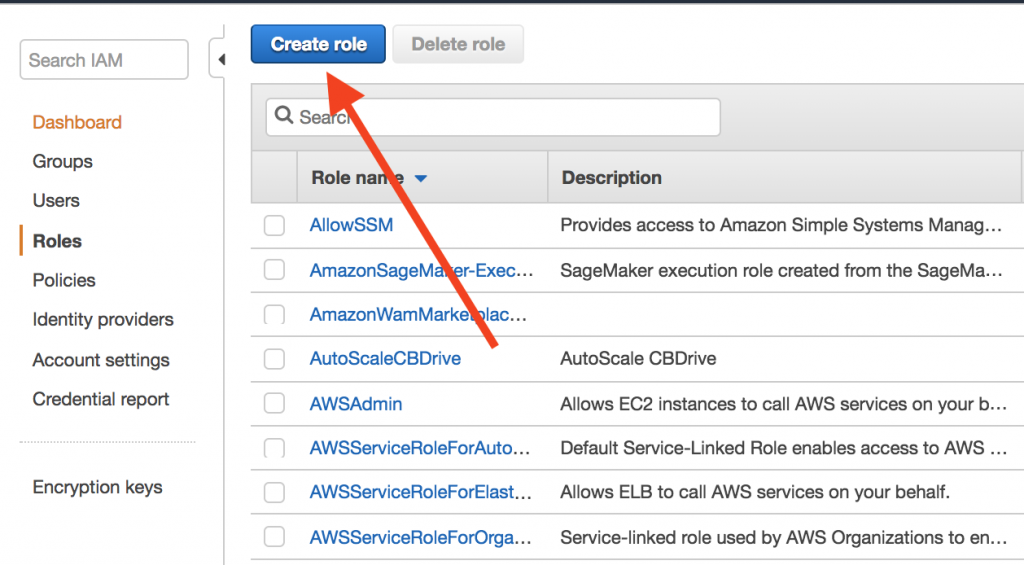
2. Navigate to Roles on the left-hand sidebar and click Create Role.
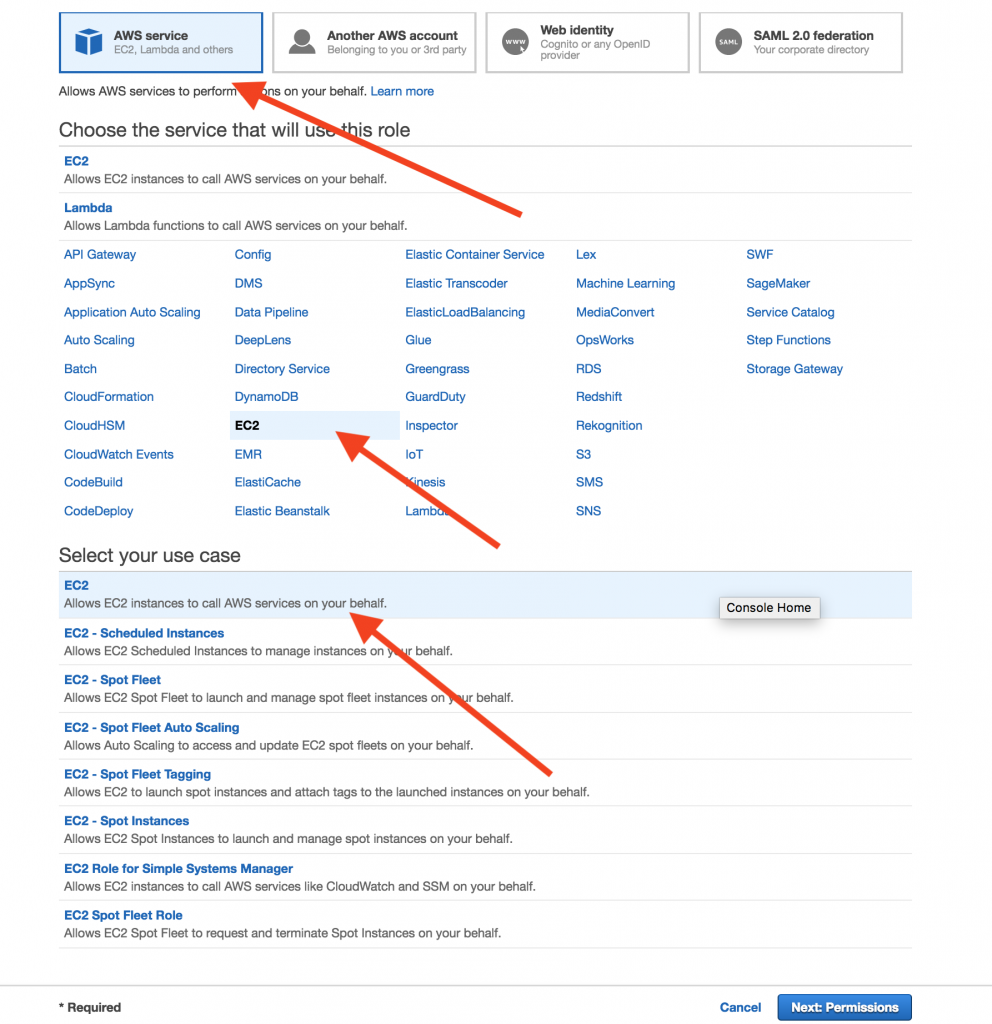
3. Select the type of trusted entity. You need AWS service. Next, select the service that will use this role (EC2). Finally, select the required case (EC2).
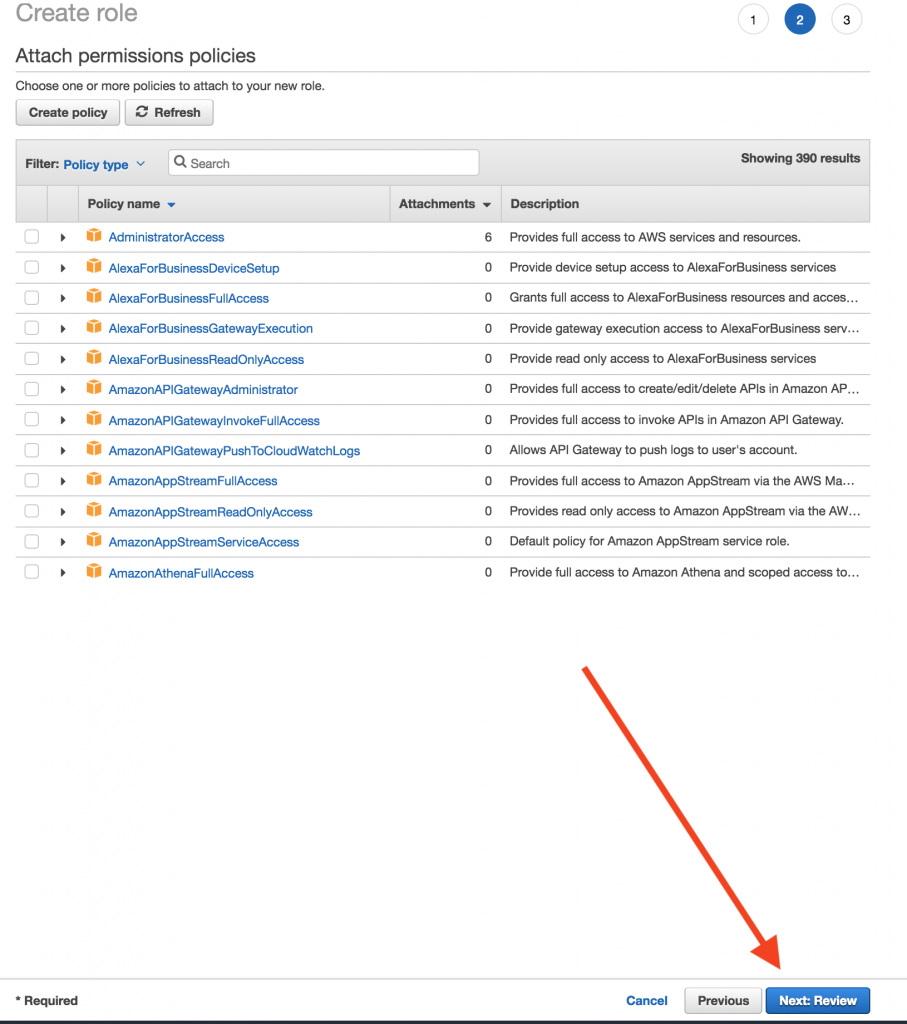
4. Skip the next step by clicking Next: Review.
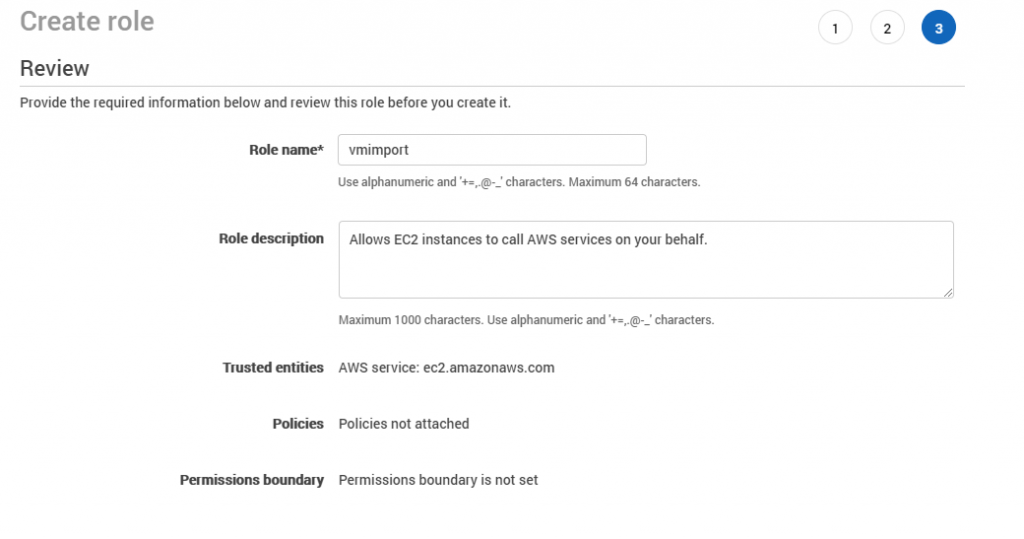
 5. Enter the role's name, review the role's information and click Create Role.
6. Click on your new role to edit policies.

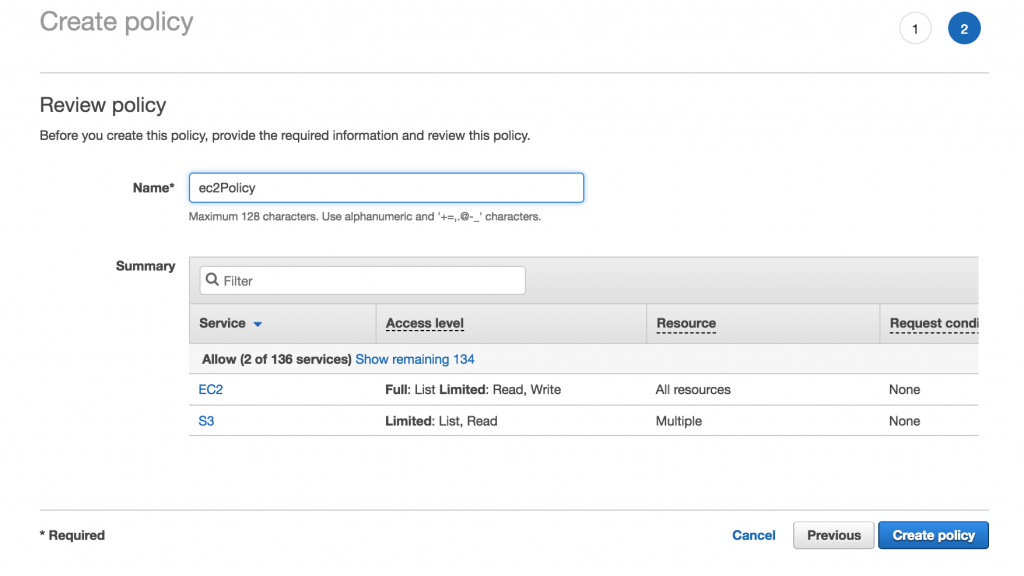
7. Under Permissions, click Add Inline Policy.
8. Switch to the JSON editor and insert the following policy:
{
   "Version":"2012-10-17",
   "Statement":[
      {
         "Effect":"Allow",
         "Action":[
            "s3:ListBucket",
            "s3:GetBucketLocation"
         ],
         "Resource":[
            "arn:aws:s3:::bucket"
         ]
      },
      {
         "Effect":"Allow",
         "Action":[
            "s3:GetObject"
         ],
         "Resource":[
            "arn:aws:s3:::bucket/*"
         ]
      },
      {
         "Effect":"Allow",
         "Action":[
            "ec2:ModifySnapshotAttribute",
            "ec2:CopySnapshot",
            "ec2:RegisterImage",
            "ec2:Describe*"
         ],
         "Resource":"*"
      }
   ]
}
Ensure that instead of buckets you've specified the name of your S3 bucket that will contain the image. When done, review the newly created policy and click Create Policy.
9. Expand the Trust Relationships section and click on Edit Trust Relationships.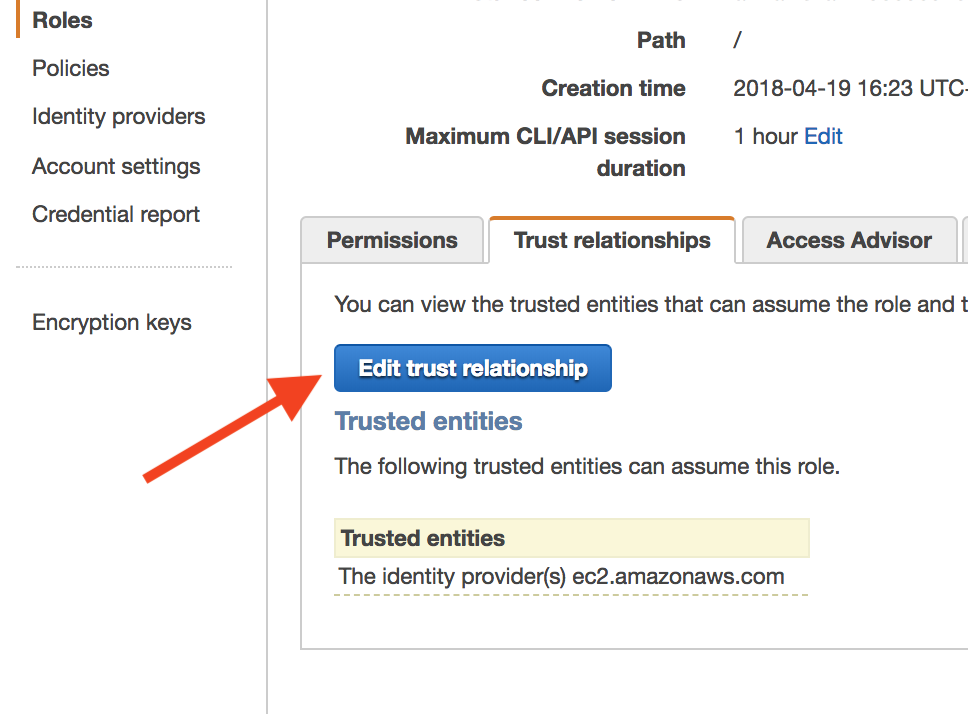 10. Insert the following script in the Policy Document editor:
Your VM import role is now entirely and properly configured!
Further Resources for MSP360
RMM Platform: This flagship product provides powerful monitoring and alerting and automated patch management and HALOPSA integration, to ensure endpoints remain secure and operate smoothly.
Start securing your IT environment today with our Free Backup Software or explore the full range of features. We are a trusted company committed to your success.
Managed Backup: This service offers reliable cloud backup and image-based protection. A key feature is the dedicated SaaS backup for popular platforms:
Microsoft 365, including OneDrive backup, Outlook Backup features, Google Workspace and the benefits of Domain Management.
Finally, find videos aimed to guide you through installation processes for the cloud storage of your choice, with advanced features of MSP360 Explorer, an overview the support for AWS Key Management Service in MSP360 Backup.

