If you’re an avid user of macOS or iOS, it’s safe to bet that some of your workflows revolve around iCloud. Whether it’s some Xcode project or a Keynote presentation, it’s likely that some, if not most, of your data resides in iCloud. The significance of this data could not be overstated and thus it makes sense to consider some sort of backup for it to ensure that you’re not caught off guard if something disastrous happens at Apple’s data centers.
Table of Contents
Getting Started
Before you proceed to perform the backup of iCloud Data, let’s first examine the way in which Apple stores it on macOS. Most of us are familiar with the iCloud Drive folder in the left side-bar of Finder:
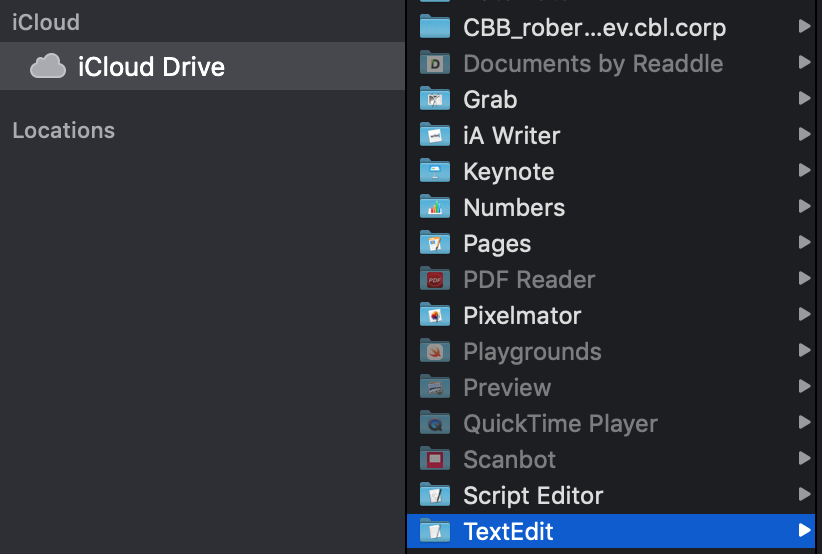
There are two problems with this folder:
- This folder is self-contained and is not accessible from anywhere except for the Finder's sidebar. In other words, you can't just copy it from the enclosing folder the way you can with the Downloads folder, for instance. This obviously limits your ability to back it up in the traditional way and requires some alternative.
- This folder does not display hidden iCloud data like preferences of your Twitter client or documents of your iOS apps. Therefore, selecting all folders and copying them to a different directory will be insufficient, as hidden data will not be copied along.
The first issue stems from the fact that the iCloud Drive folder is nothing but an alias for another folder buried deep down in macOS. This folder is located at ~/Library/Mobile Documents. However, if you try to locate it, you'll see that this folder cannot be opened like any other folder. It seems that Apple wants us to access iCloud Drive data exclusively from the Finder's sidebar and not from its actual location.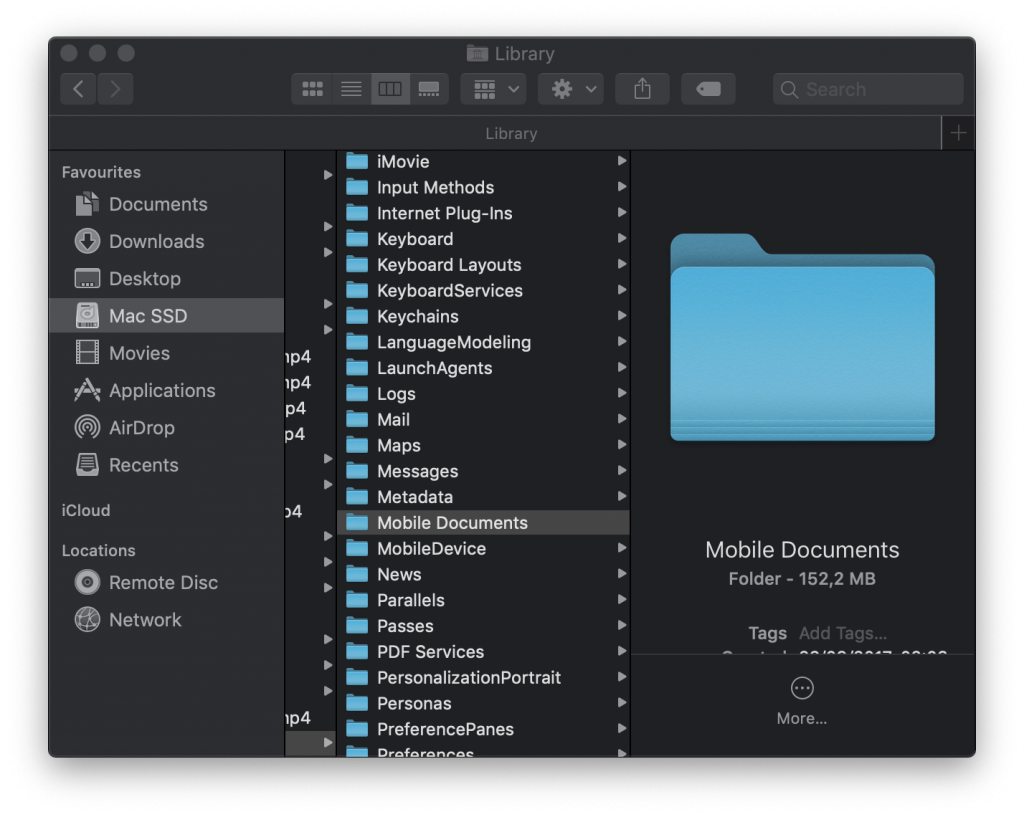
That's not a problem though; you can just copy this folder and paste it on your Desktop to examine its contents. If you do that, you'll notice that this folder does not contain the iCloud photo library. That's because the iCloud photo library is located in a different directory at ~/Library/Pictures/Photos Library.photoslibrary.
Alright, by now we have two directories: one is the location of the iCloud data and the other is the location of the iCloud photo library. We're almost ready for backup; although, one final issue needs to be addressed before we proceed to backup.
Granting Access to iCloud Photo Library
Apple is known and praised by many for its strict privacy policy. As a consequence, access to the iCloud Photo Library is denied by default to any app, including MSP360. In order to authorize MSP360 Backup to back up iCloud photo library, you need to grant it a certain permission in the privacy settings.
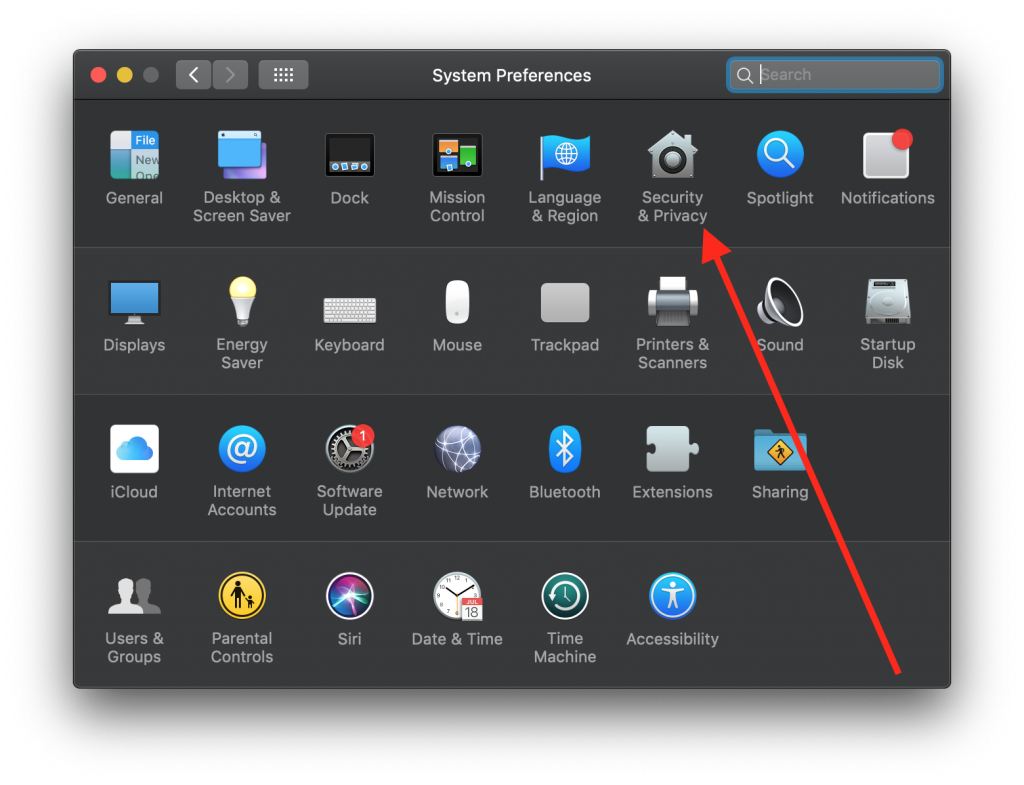
Go to System Preferences and click Security & Privacy.
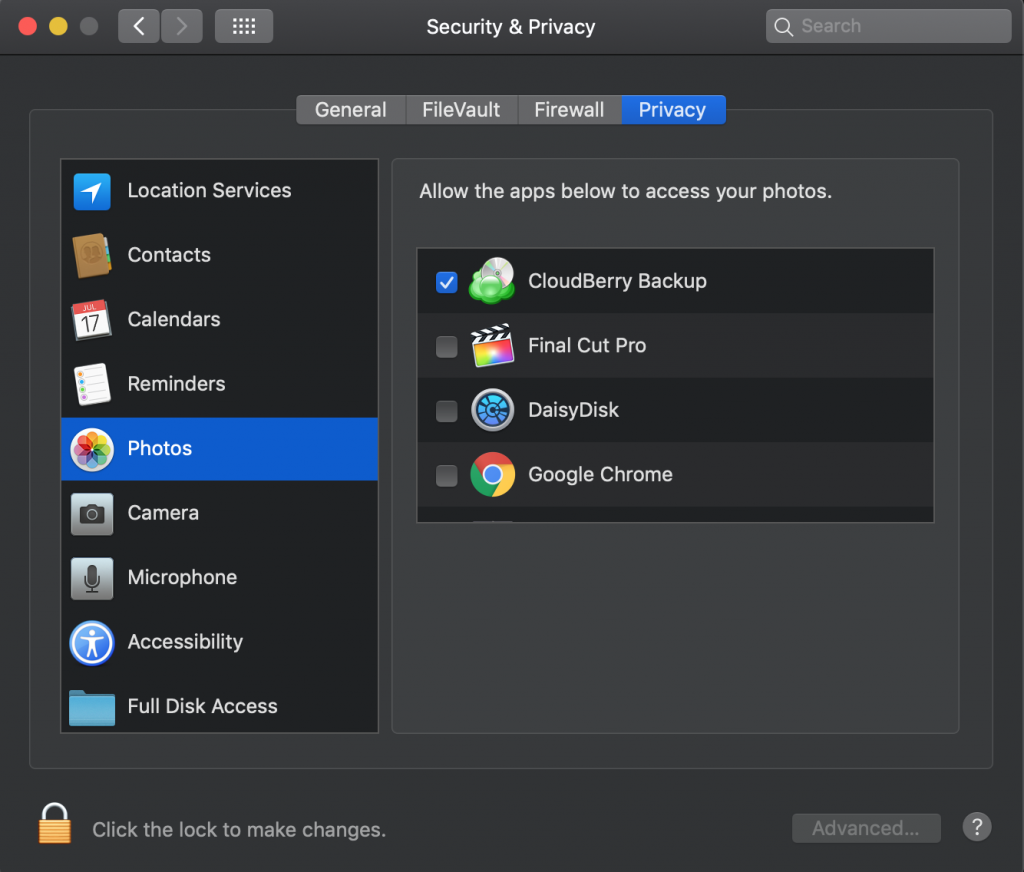
Under Privacy, click Photos, and then select the MSP360 Backup checkbox. This will grant MSP360 Backup access to the iCloud photo library.
Now we're finally done. Let's proceed to create a backup plan that will perform regular backups of iCloud data as well as the photo library.
Backing up iCloud Drive & Photos
Open MSP360 Backup. Press CMD+B to launch the Backup Wizard.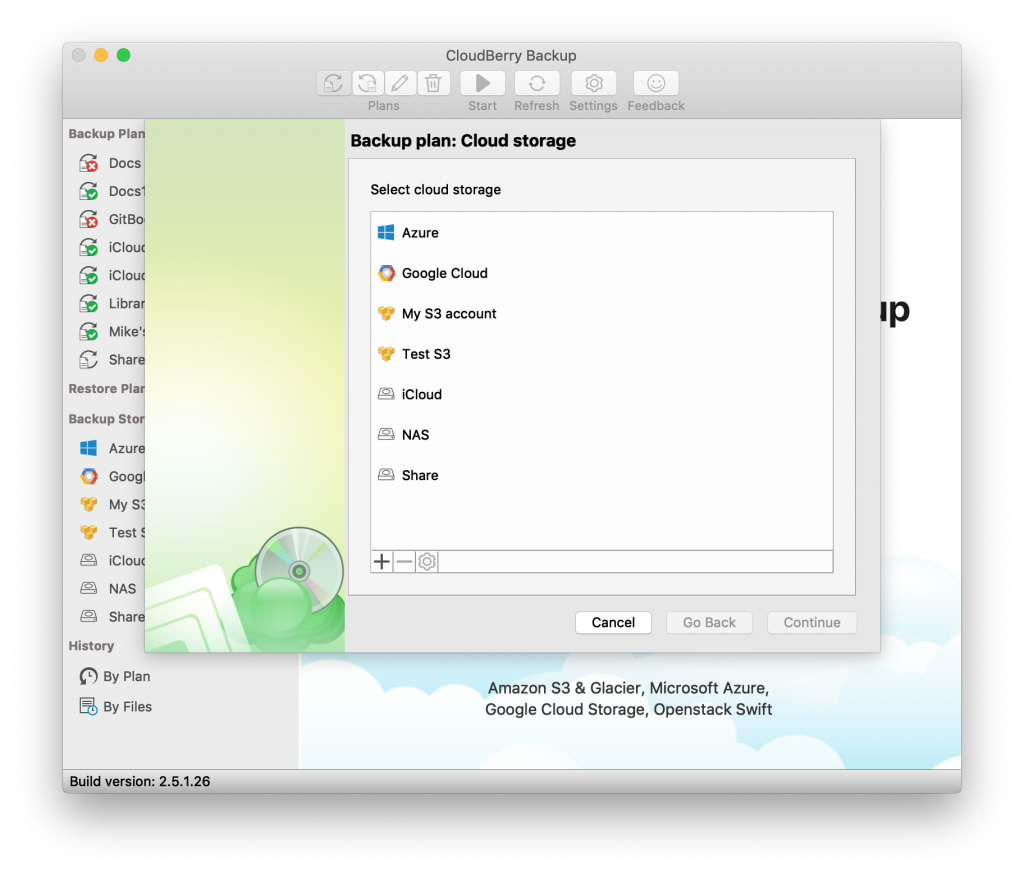
Continue through the wizard until you reach the Backup source step. The folder containing iCloud data is hidden by default. To display the hidden folder, select the Show hidden files and folders checkbox at the bottom:
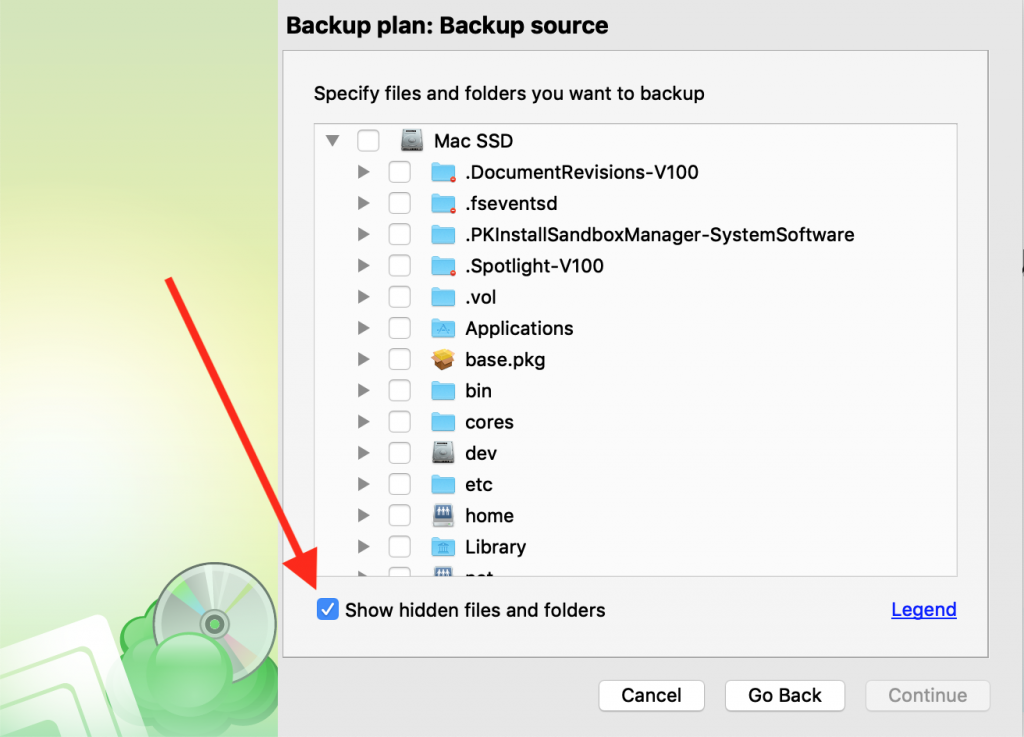
Now everything should be displayed as expected. Select the folder containing the iCloud data as well as the iCloud photo library.
Conclude configuring the Wizard until you reach the Summary step. On it, you should notice the two directories targeted for backup:
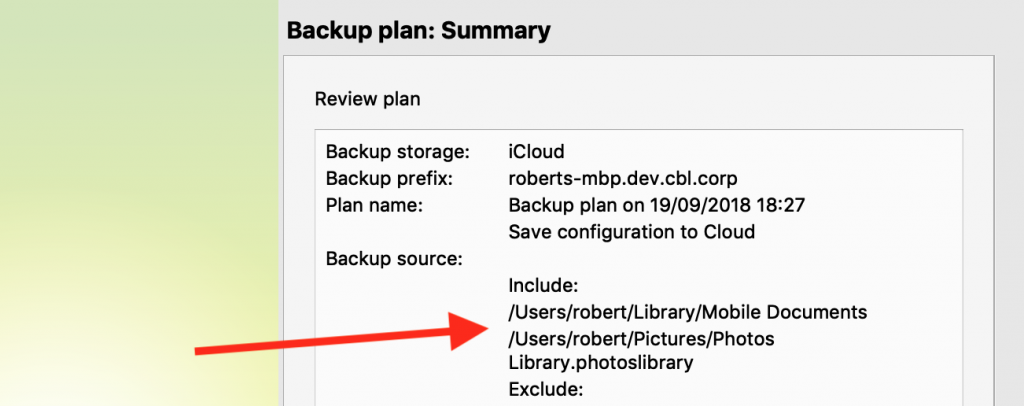
When you execute the plan, the iCloud data will successfully be uploaded to the backup storage like Amazon S3 or Google Cloud and you can rest assured that your critical data is replicated on at least one other cloud storage.
Conclusion
Putting your iCloud eggs in one basket is never a good option. It's well-known that relying on a single cloud storage to store crucial data is not a sensible approach from the standpoint of any backup strategy. And while backing up iCloud data does present technical difficulties at first, you can easily tackle them by identifying the right folders and granting necessary permissions. In the end, you get the regular backup of all your iCloud files and photos to another cloud storage service and as a result — proper data integrity.


