MSP360 Backup supports B2 Cloud Storage by Backblaze. B2 Cloud Storage service offers its users unlimited storage for $0.005/GB per month with 10GB for free.
In this post we explain how to sign up for the B2 Cloud Storage account, connect it with MSP360 Backup and configure a backup plan.
Table of Contents
Let’s get started with a sign-up.
How to Sign up to B2 Cloud Storage
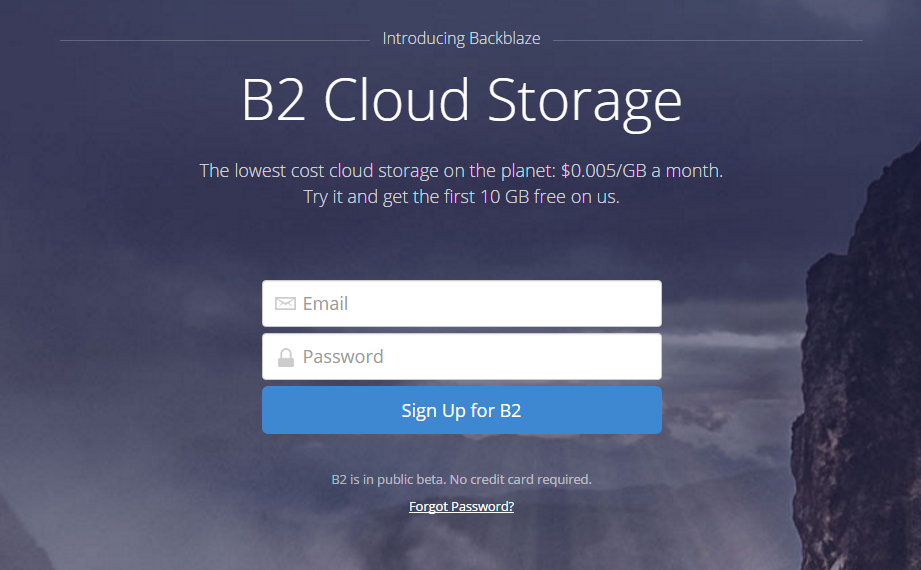
- On the B2 Cloud Storage page enter your email and account password, click Sign Up
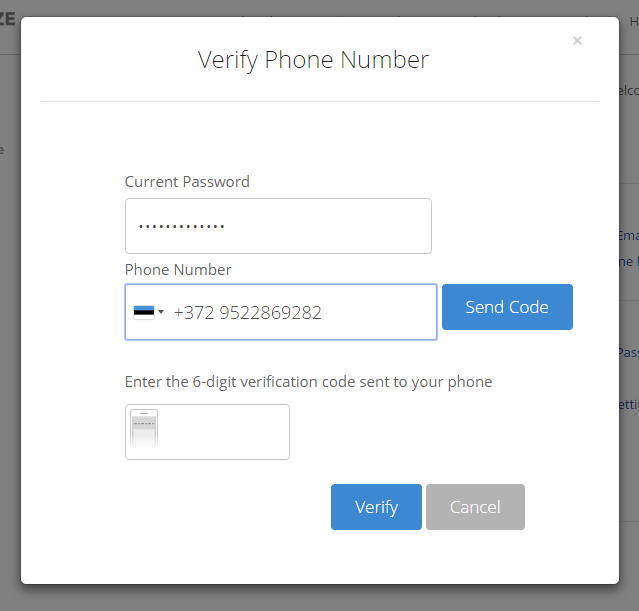
- To be correctly enabled, B2 Cloud Storage requires Two-Factor Sign in Activation. Provide your phone number along with the current password and enter a 6-digit verification code sent via SMS.
How to Find B2 Cloud Storage Account ID and Application Key
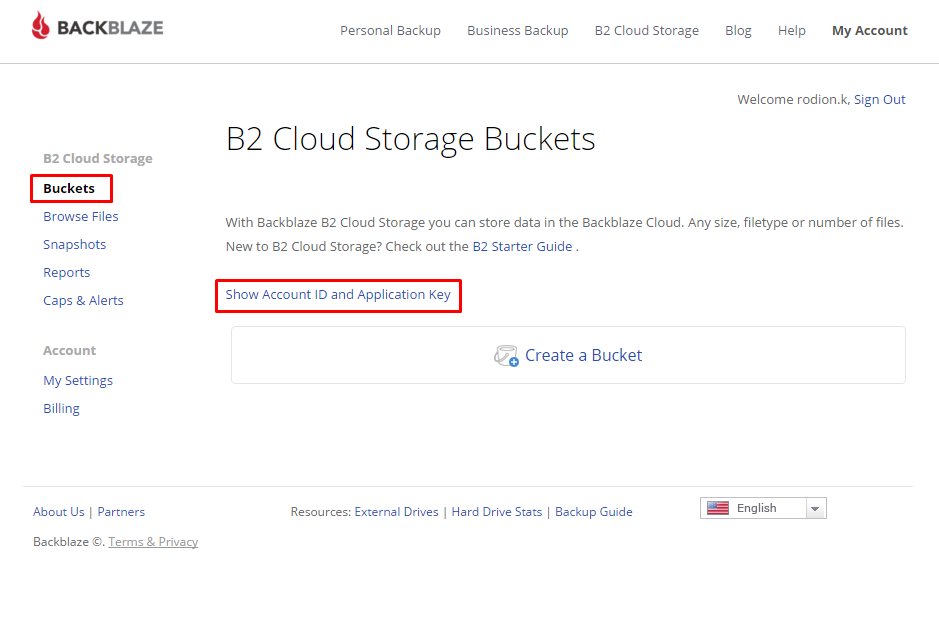
- After you verified your account, go to the Buckets section and click Show Account ID and Application Key
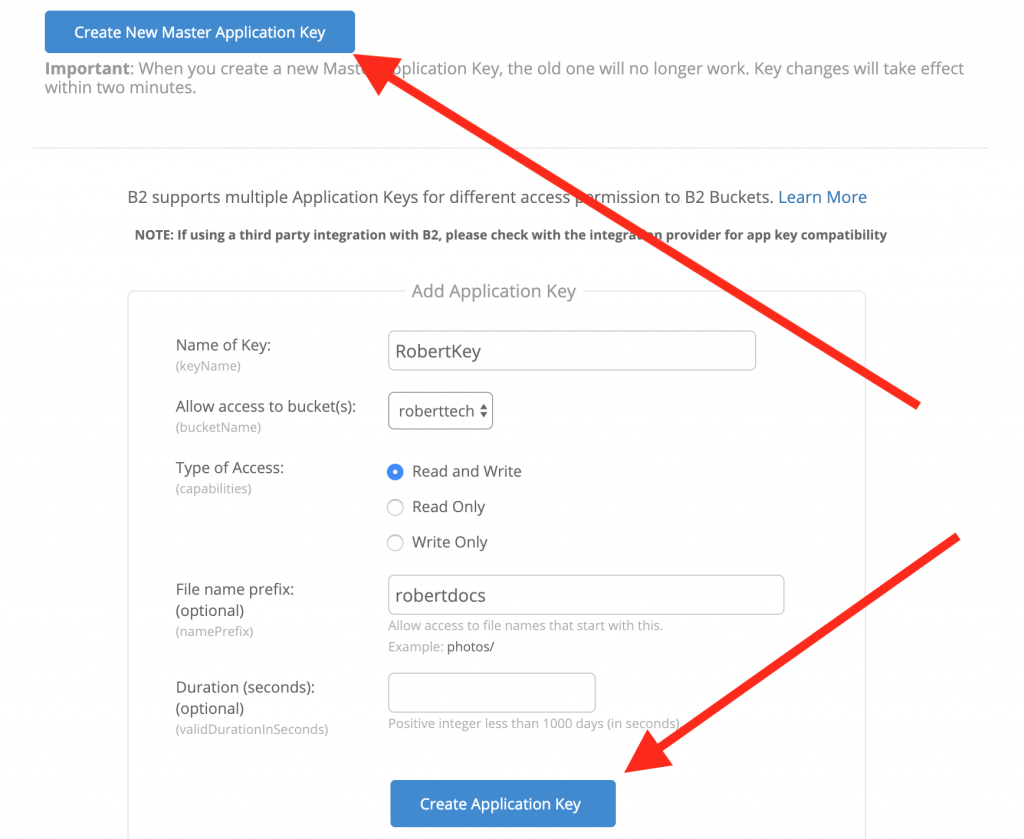
- In the popped up window, either click Create New Master Application Key to create root-level keys or click Create Application Key to create an application key with limited permissions. Please note that it's recommended to create application keys for backup purposes, as master keys allow unrestricted control over every single operation within your B2 account and are therefore dangerous to distribute among users.
- A pop-up window will appear with a set of credentials you've just created. Make sure to write these down somewhere, as they're only shown once. If the keys are lost, a new set of keys will have to be generated.
Root-level master keys: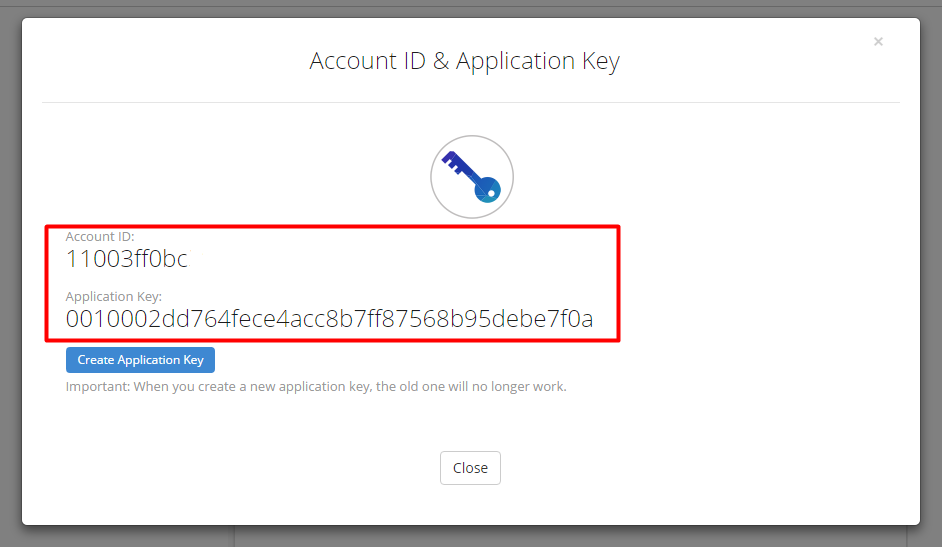
Application keys:
How to Start Using B2 Cloud Storage with MSP360 Backup
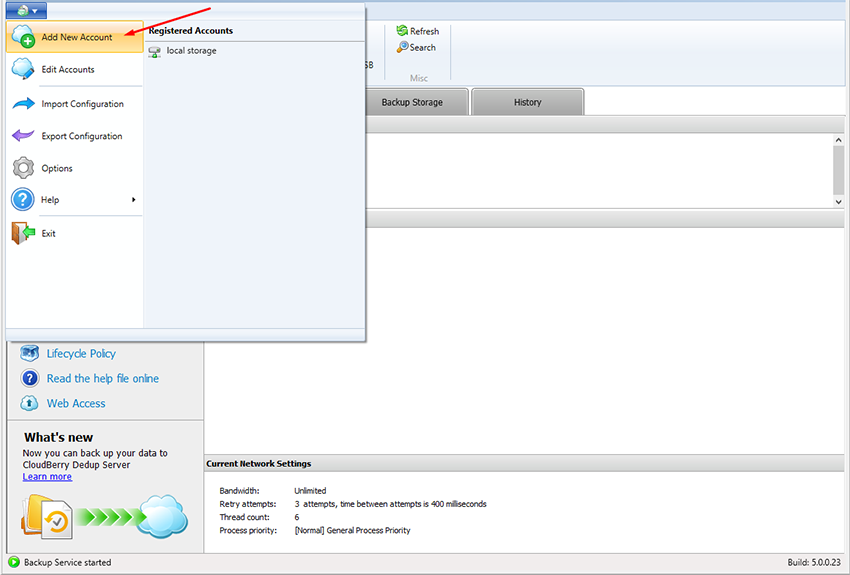
- Open MSP360 Backup and choose to Add New Account. Choose B2 cloud Storage from the list of supported storage services.
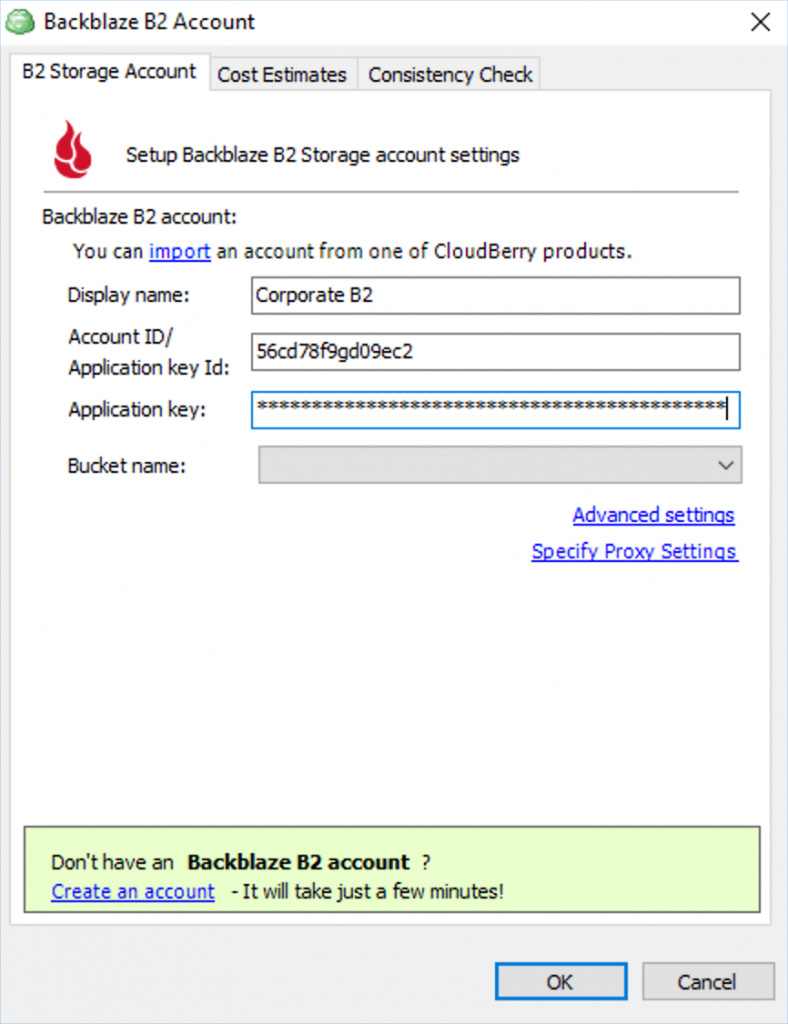
- Enter a Display Name and then provide the Account ID (for master keys) or Application Key ID (for application keys) and Application Key from the previous step. Create a bucket via the B2 web interface and you will see it listed in MSP360 Backup. Choose the bucket you want to use for backup and click OK.
How to Setup B2 Cloud Storage as a Backup Destination Bucket via MSP360 Backup
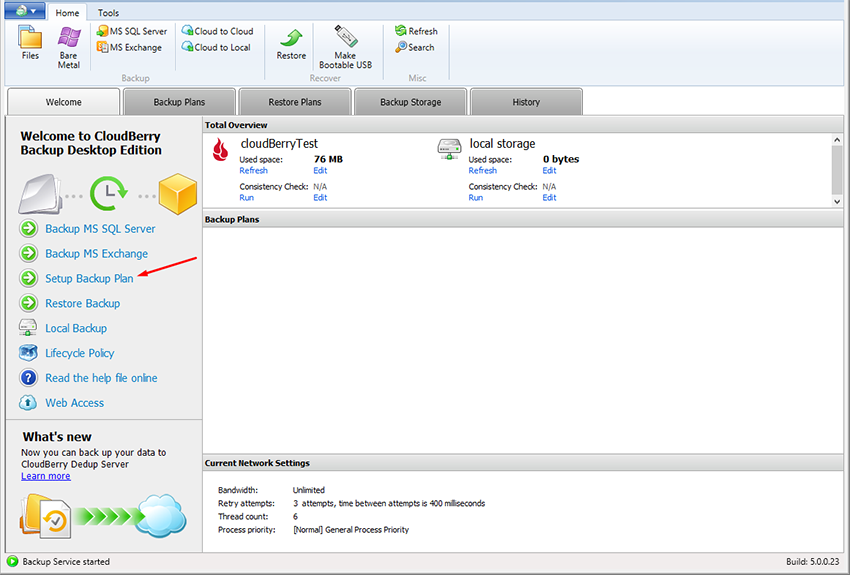
- Choose Setup backup plan from the menu on the left
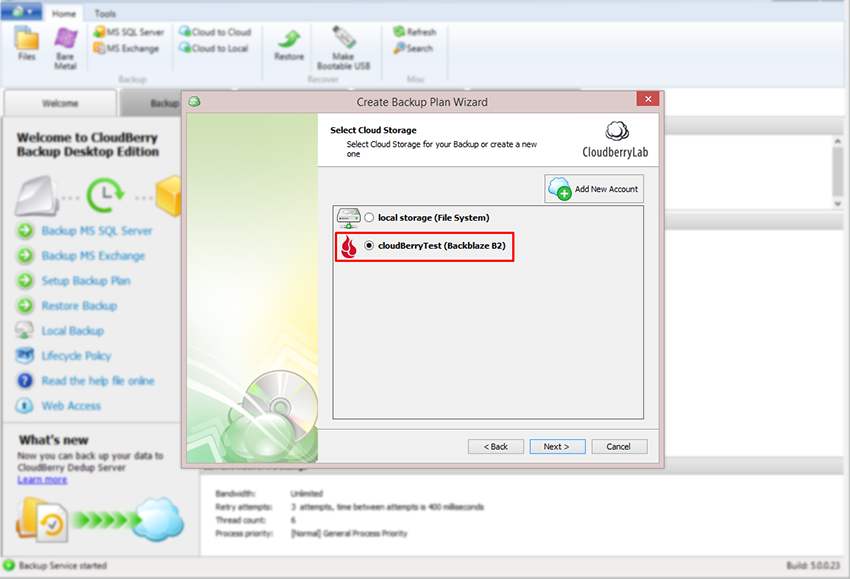
- Select B2 Cloud Storage from the list of available services
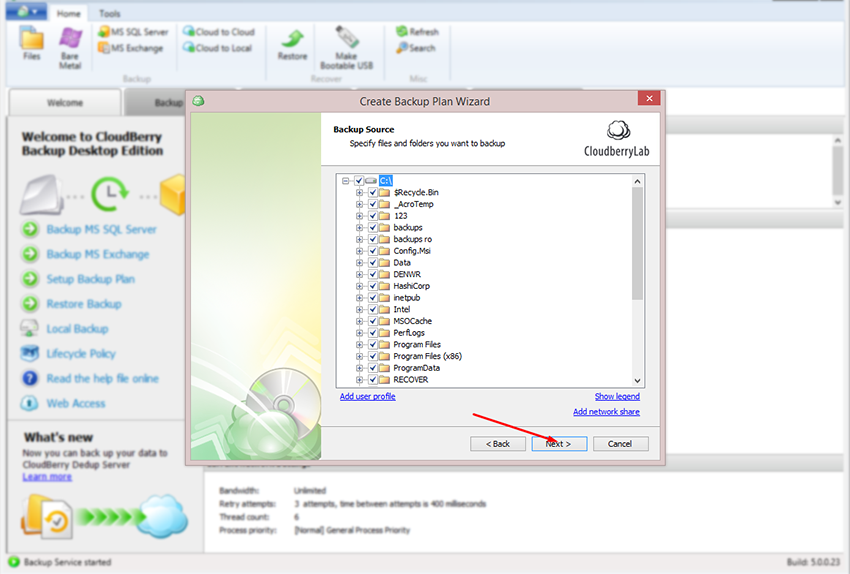
- Follow the backup wizard steps to configure your backup plan
Conclusion
Now you've successfully signed up to B2 Cloud Storage service, found your Account ID and Application ID, and configured a bucket as a destination folder for your cloud backup.

