Table of Contents
How to Back Up MS Exchange with MSP360
For the most detailed manual with the screenshots illustrating each step please refer to this section of our Web Help.
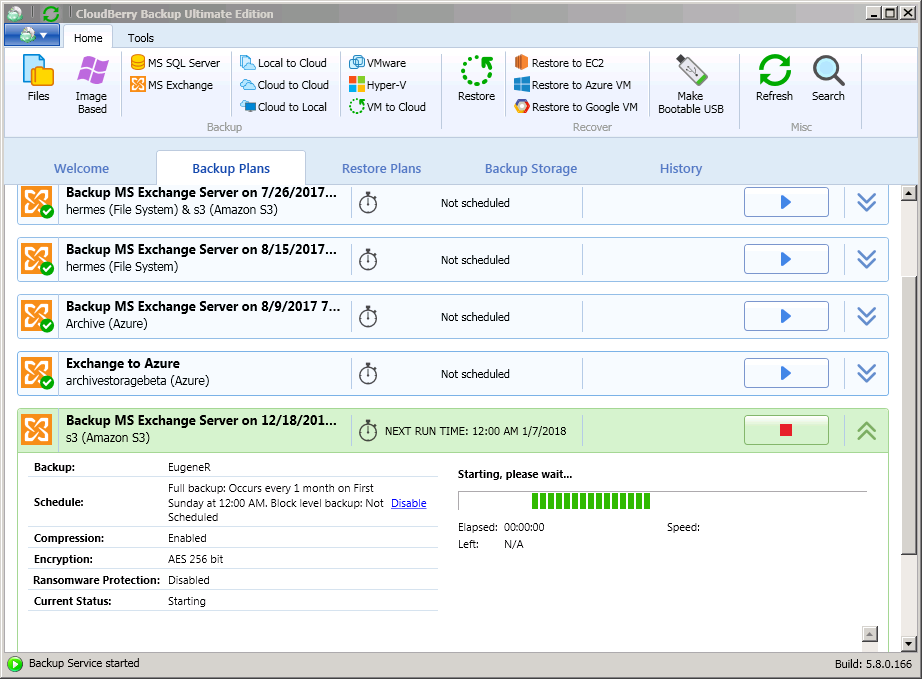
1To create an Exchange Server backup plan, launch MSP360 Backup. On the main toolbar, click MS Exchange.
2Then you should select the backup destinations.
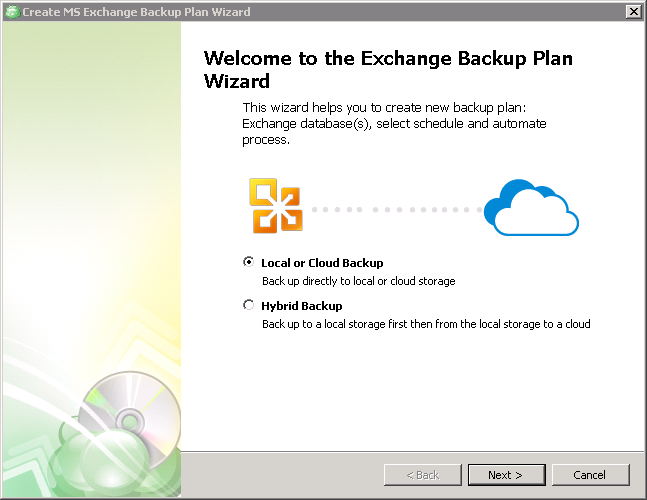
If you select Hybrid Backup, you will be asked to specify both the local storage that will be used to store a local backup and the cloud storage that will be used to store a cloud backup.
3Name your backup plan and indicate whether you want to save the plan's configuration in the cloud.
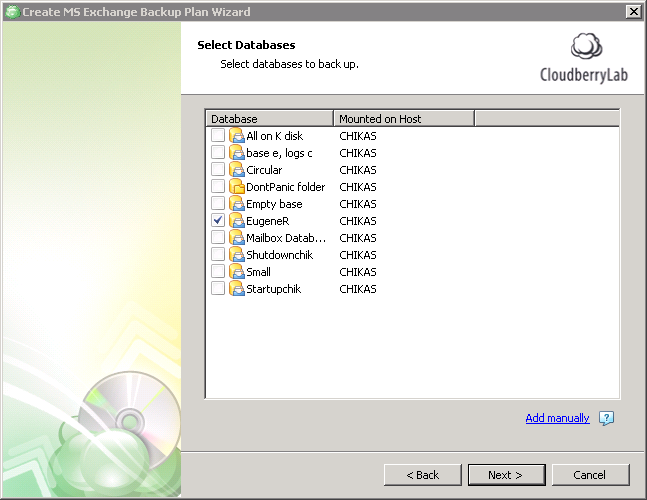
4Now select the databases you want to back up.
5Specify if you want to use the system VSS provider.
6Enable compression and encryption features if needed.
7Configure the retention policies. In case you perform Hybrid backup plan, you can set different retention policies for local and cloud parts of backup.
8Set the schedule for your backup plan. You can choose frequency, recurrence, immediate resumption of the plan.
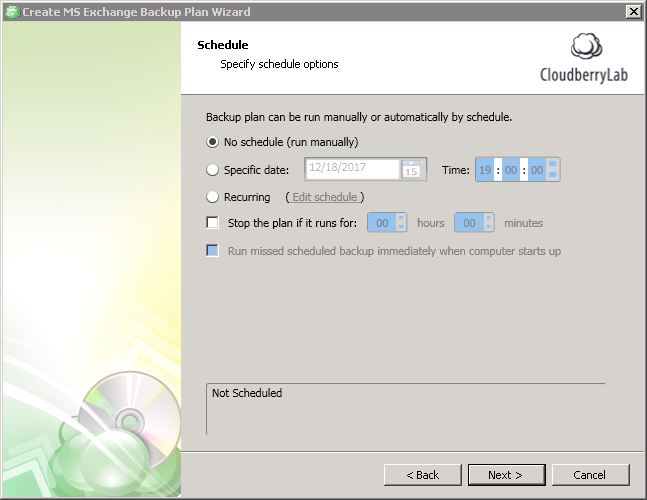
9Schedule Full Backup. Since MSP360 Backup performs incremental backups, you will need to schedule a full backup with the required frequency. It is highly recommended to perform the full backup from time to time.
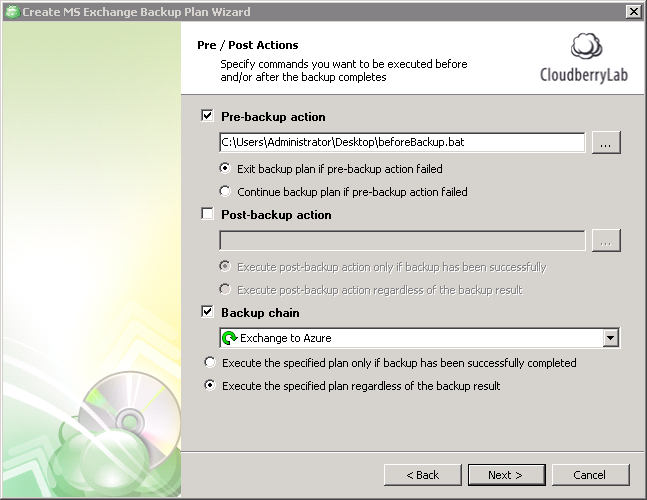
10Specify the optional pre- and post-actions.
11Then you can configure email notifications and execute your backup plan. You will be able to observe the backup process in the green progress bar in the dedicated dashboard section.
How to Restore MS Exchange Server with MSP360
Basically, it takes two steps to restore Exchange files/databases: you need to download Exchange database and log files from the cloud storage and replace current Exchange files with the restored files. Let's look at the entire recovery process step by step.
For the most detailed manual with the screenshots illustrating each step please refer to this section of our Web Help.
1Run MSP360 Backup.
2Click on the "Restore" icon.

3Select backup storage and specify your restore plan name.
4Choose kind of data you need to restore.
To proceed with restoring Microsoft Exchange Server data, select the "Restore files and folders" option on this wizard page.
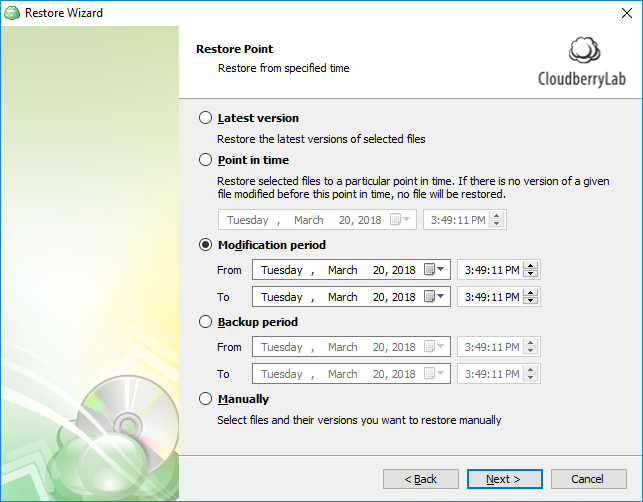
5Select the restore point.
On this step, you can choose to restore specific file versions, restore to a specific point in time, or only restore versions that were modified/backed up during a specific time interval.
6Specify the restore destination.
7On next steps specify
- the encryption options,
- schedule,
- system log settings
for your restore plan.
8 Check Network Shares.
If you specified one or more network locations before, you can make the wizard check whether it will be able to access these locations.
9Save and run your restore plan.
Review your settings and click Finish to apply the changes.
Microsoft Exchange Item-Level Restore
In Microsoft Exchange 2010 Edition, MSP360 Backup features the recovery of individual items in an Exchange Server database so that you can view and restore specific emails, contact data, and other information in your backups.
To get the detailed step-by-step manual on how to perform the item-level restore, please refer to the corresponding blog post: Item-Level Restore for Exchange 2010 with MSP360 Backup.
Conclusion
MSP360 Backup for MS Exchange is a simple, cost-effective and reliable solution for backing up Microsoft Exchange to the target of your choice. It allows you to perform Exchange-aware backups with the log truncation, export Exchange mailboxes to PST and even to restore individual Exchange items (for MS Exchange 2010 edition).
Download MSP360 Backup for MS Exchange and check out its advantages during the free 15-day trial.


