Amazon Web Services charge users monthly on a Pay-As-You-Go basis. Sometimes your bills can unexpectedly go high. For example, if you have a running, but not used “t2.medium” Amazon EC2 instance, you will pay additional $51.24/month and excessive provisioned IOPS on EBS volume can lead to an extra $120/month.
In this article we explain how to avoid unexpected bills with AWS CloudWatch Billing Alarms and SNS Notifications.
Configure CloudWatch Billing Alarms and Threshold Notifications for AWS Account
Step 1: Enable Billing Alerts for Your Account
1Sign in to the AWS Management Console and open the Billing and Cost Management Сonsole.
2On the navigation pane, choose Preferences.
3Select the Receive Billing Alerts check box.
4Choose Save Preferences
Now, you have enabled Billing Alerts for your AWS account. Next step is to create e-mail or SMS notifications that will warn you, if the sum overcomes the desired threshold.
Step 2. Create SNS Topic and Enable Appropriate CloudWatch Alarm
This step is also divided into three consecutive actions. First, you need to create an Amazon SNS notification list:
1 Open the Amazon SNS console.
2 On the navigation pane, choose SNS Home.
3In the Common actions section, choose Create Topic.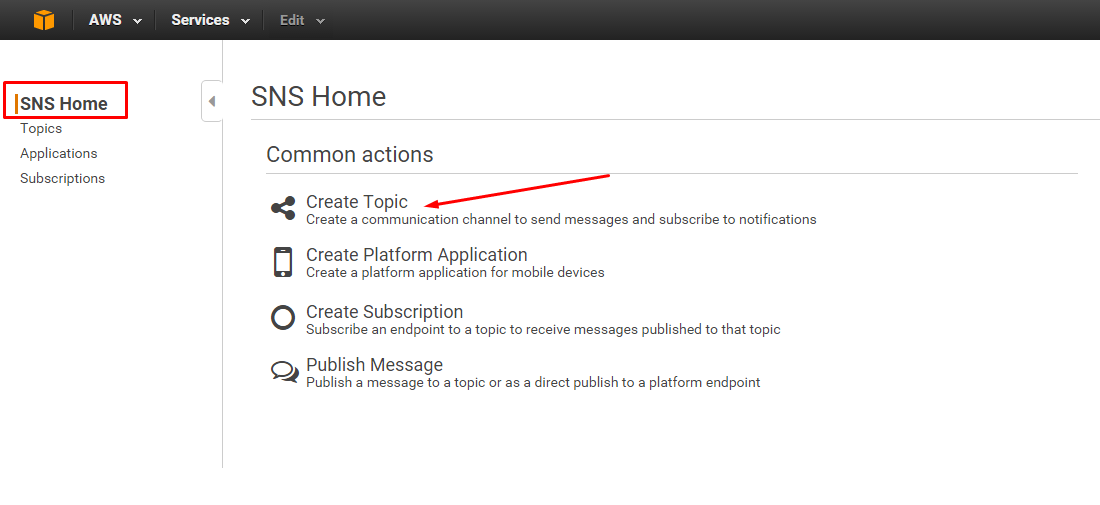
4In the dialog box, for Topic name, enter the name for your notification list.
5(Optional) If you want to use this notification list to send SMS messages, for Display name, enter the name you want to appear on your SMS messages.
6Choose Create topic.
7On the navigation pane, choose Topics and choose the topic you’ve created.
8Choose Create Subscription, choose Email or SMS as protocol and define your address or a phone number.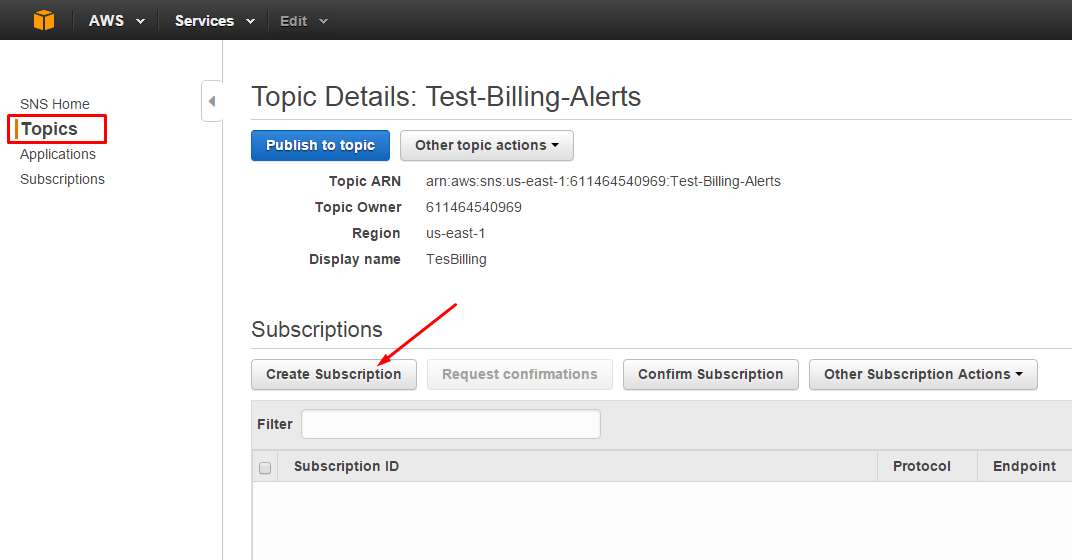
9Confirm an Email address by following the link in the confirmation letter from AWS.
If you don't confirm the email address, the subscription remains in the pending confirmation status until you do so, and does not send a message.


Enable the CloudWatch Alarm:
1Open the CloudWatch Console.
2If necessary, change the region on the navigation bar to US East (N. Virginia). The billing metric data is stored in this region, even for resources in other regions.
3On the navigation pane, under Metrics, choose Billing.
4Choose Create Alarm.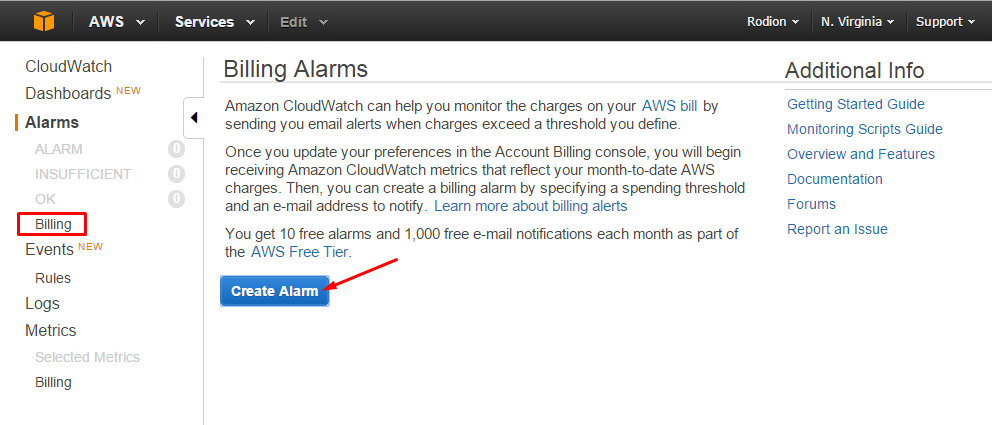
5In a new window choose Show advanced to ensure all metrics are set correctly.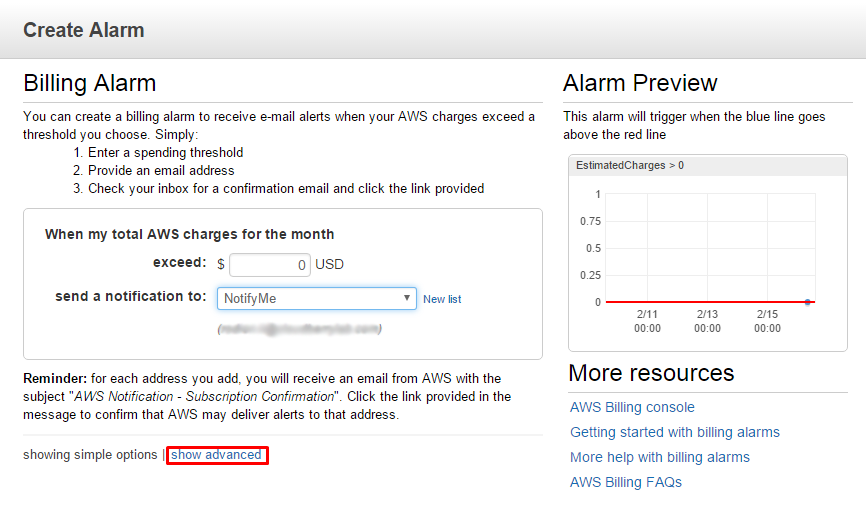
6In the list of billing metrics, make sure the metric check box (next to currency) contains EstimatedCharges in it.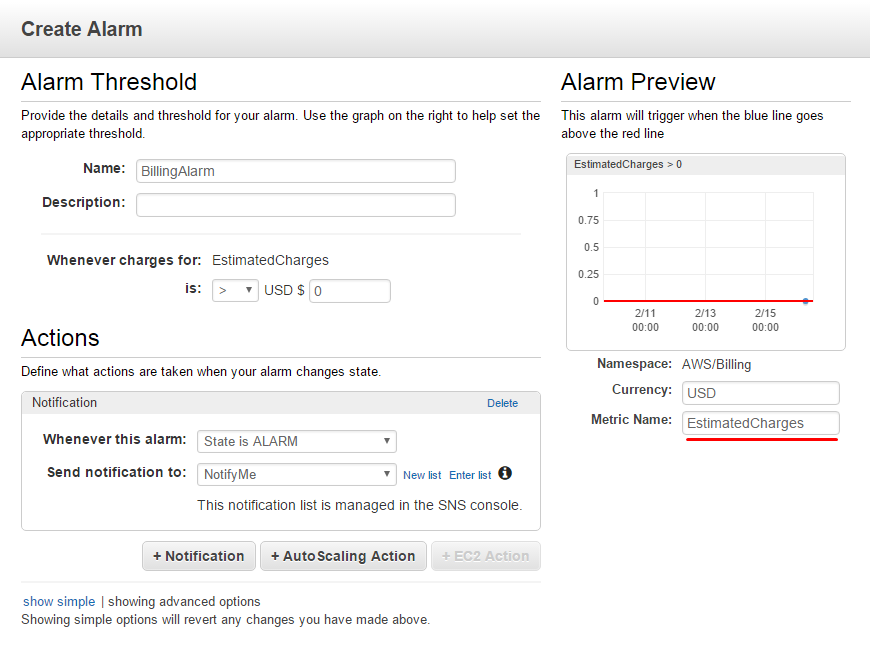
7Set up the Name and (optionally) a description for a new alarm.
Define the Alarm as Follows:
1Set the desired sum in “when my total AWS charges for the month exceed” check box.
Note:We recommend to set up two alarms: when achieving ½ of the estimated budget and when exceeding the estimated budget.
2Select an Amazon SNS notification list from the drop down menu or create a new list by entering email addresses in the box.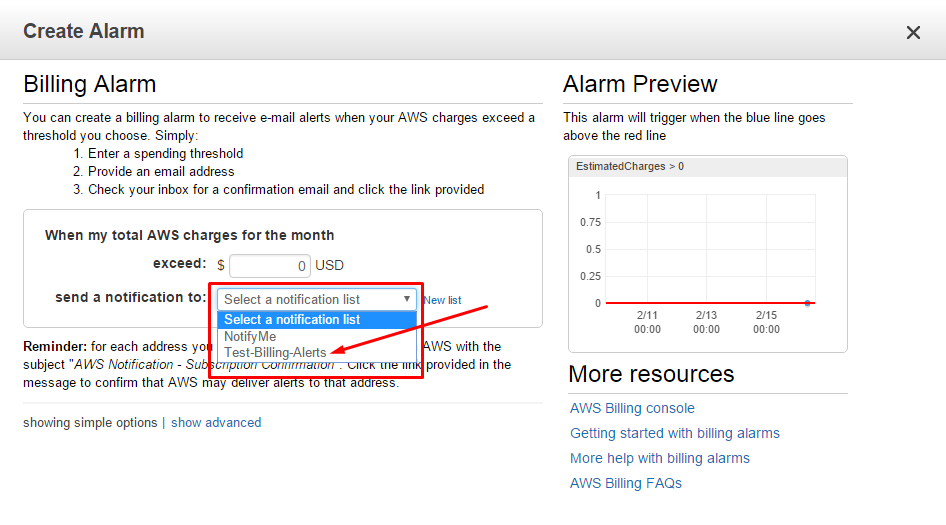
3Choose Create Alarm.
To view the status of your alarm, you can go to Alarms in the navigation pane.
Conclusion
Now you have enabled billing notifications for your AWS account. Each time the bill would exceed the defined budget, you will receive a notification to your email or mobile phone. This way you can always be aware of services you pay for and quickly disable them, when the bill exceeds the desired threshold.


